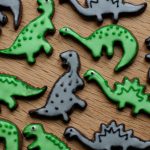
Dinosaur Cookies
You will also need: dinosaur cookie cutters baking sheet lined with baking parchment paper 5 piping bags, 3 with no2 Tala tips (fine writer), 2 with no3 Tala tips (slightly larger writer) cocktail stick
Ingredients
- One batch cookie dough chilled and ready to roll (see my chocolate cookie dough recipe)
- extra flour for rolling use cocoa for chocolate cookie dough
- 1 batch royal icing
- extra icing sugar for adjusting icing consistency
- lemon juice for adjusting icing consistency
Instructions
- Preheat the oven to 180c / Gas mark 4.
- Roll out the dough to 5mm thick, dusting the surface with a little extra flour if necessary. Cut out dinosaur shapes.
- Bake for around 10 minutes. Allow them to cool slightly before transferring to a wire rack then leave to cool completely.
- Meanwhile split your royal icing into different batches. Retain one quarter to keep white in case you run out of other colours. The rest, you can split into two or three colours, I made my dinosaurs green and grey. From each of the coloured icings, remove 2 tablespoons and decant into a smaller container. Add to each, more colour and more icing sugar to make thicker icing for the borders.
- Using disposable bags fitted with no2 size Tala tips, fill each bag with the thicker border icing. Pipe borders around your dinosaurs. Immediately flood each cookie with the respective colour and drag icing to the edges with cocktail sticks. This works best if you do it in batches of 1-2 cookies at a time.
- Let the flooded cookies dry out. When completely dry pipe extra detail and eyes on them. You can do a white dot onto which to pipe a black pupil as I did with these green dinosaurs if you like.
- Allow to dry completely. The cookies will keep in a tub for 1-2 weeks however the borders may bleed a little after a couple of days. If you are a perfectionist, you can reduce the likelihood of this by using a border the same colour as the flooded area and letting the cookie dry completely before piping a darker border.
