
I’ve seen the light. In November it is very definitely outside. Most of these pictures were taken outdoors, my first time photographing food in the garden. Given the gloom indoors on even the sunniest day, I am really pleased with these pictures and will be heading out there to snap away in my hat and coat when it isn’t windy or raining.
This cake is a re-working my Banoffee Cupcakes. You may recognise the icing and toffee sauce but the cake is very different. This was not intentional but instead the result of an OMG-I’ve-read-the-wrong-line-on-the-recipe-when-weighing-out-the-ingredients moment.
I’d already creamed the fat and sugar together before I realised. I had broken the first rule of my new book that I bought from my son’s preschool bookclub this week, Mary Berry’s Baking Bible: “Weigh out all your ingredients and have everything ready before you start.” I’d put 220g of margarine with the sugar instead of 75g.
Oops. So I consulted Nigella Lawson’s How to be a Domestic Goddess fairy cake recipe and as I’d recalled, she uses equal quantities of fat, flour and sugar in a mix I’ve used many times before. So I copied the same ratios on a larger scale and we ended up with a 9″ cake instead of 7″.

As is frequent when I bake cakes, I was nervous but strangely optimistic putting this mix in the oven. Given that I had invented this cake myself on the hoof, I didn’t have a clue what the oven temperature should be or how long it would take to cook. Would it be nearly an hour like the Harry Eastwood Chocolate Heartache Cake? I hoped not as it was already 10pm.
I went for a cautious 190c and reduced this halfway through to 180c. To my surprise the cake was cooked after just 30 minutes. It was my gift to my auntie Angi for her birthday the next day and I didn’t have time to make it again!
I iced it first thing in the morning and then drizzled the toffee sauce over and took the photographs just before we left home at midday. The banana icing (which seems to have a half life of several months or does it just feel like that long since Monday?) was soft enough to spread with a knife but I might do better in future to allow time for an apricot glaze so that the surface of the cake doesn’t crumble. This one didn’t do this too badly but even so I am learning that good cakes cannot be rushed.
For the banana cream cheese icing:
1 half quantity of the icing from Banoffee Cupcakes. If made in advance, keep it out of the fridge overnight so you can spread it easily. Dare I say it, you will still have some left. This stuff grows I swear…
Although I still have some of this banana icing left, I think I will spare you all a third recipe with it. Unless of course I receive requests!
Banana Pecan Fudge Cake
Equipment
- 2 x 9" round loose bottom sandwich tins lined with baking parchment. I use pre-cut baking parchment circles from Lakeland.
- Piping bag disposable one, with end snipped off
Ingredients
For The Cake:
- 220 g self raising flour
- pinch salt
- 1 tsp bicarbonate of soda
- 220 g baking margarine softened
- 220 g soft light brown sugar
- 4 medium eggs
- 2 bananas ripe
- 1 tbsp lemon juice
- 100 g pecans chopped - how coarse is up to you - use 100g bag but save some for decoration
- 100 g fudge pieces I used bag from baking aisle - save a third for decoration
For The Filling:
- 100 g salt caramel sauce or dulce de leche
For The Banana Cream Cheese Icing:
- 1 quantity banana cream cheese icing from my Banoffee Cupcakes recipe
For The Decoration:
- 30 g fudge pieces left over from cake mix ingredients
- 20 g pecans chopped, left over from the cake mix ingredients
- 1-2 tbsp salt caramel sauce
Instructions
- Grease the sandwich tins and line with baking parchment. Set the oven to 190c or Gas mark 5. Sift the flour, salt and bicarbonate of soda together.
- Cream the baking margarine with the sugar in a big mixing bowl until fluffy - preferably using an electric hand held mixer. Beat in the eggs.
- Give the bananas and lemon juice a quick whoosh in the hand blender until smooth. Add to the creamed fat and sugar mix then work in the dry ingredients.
- Stir in the chopped pecans (saving a few for decoration) and 70g of the fudge chunks. Divide the mixture between the two sandwich tins.
- Bake both cakes in the oven for 25-30 minutes until a cocktail stick comes out cleanly. I swapped which shelves mine were on after 15 minutes and then reduced the oven temperature to 180c / Gas mark 4. One of my cakes sank a little but the other one didn't. You could bake them separately if you wanted. I used the slightly sunken cake as my bottom layer but to be honest I think I would have got away with them either way round when it was decorated.
- Let the cakes cool in their tins for ten minutes then loosen around the edges with a small palette knife and turn out onto wire racks to cool fully. Remove the baking parchment carefully - I did this when cool as the fudge wanted to peel off with it when still warm.
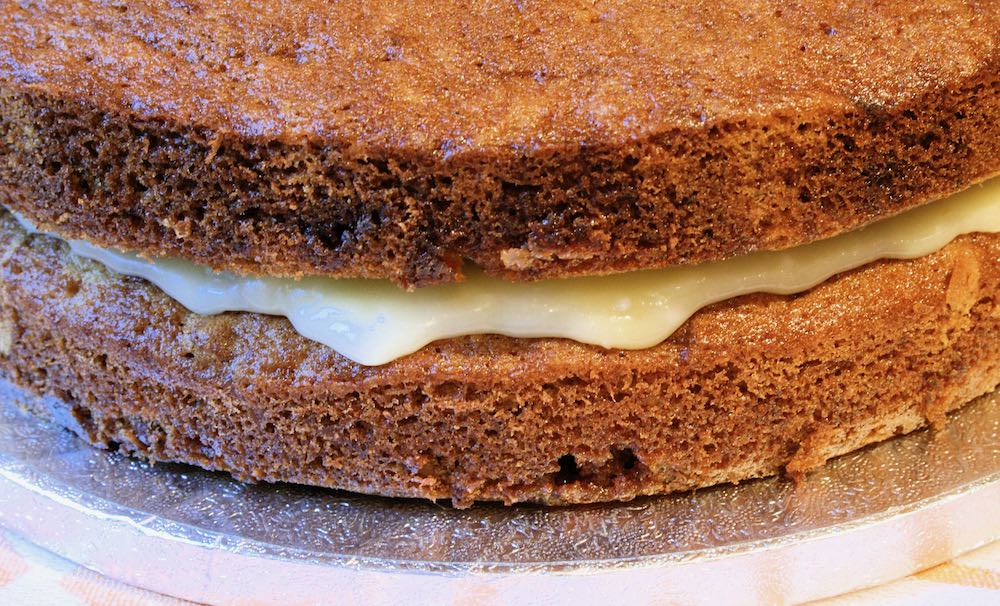
- When cool, spread salt caramel sauce on one base and sandwich the other cake on top.
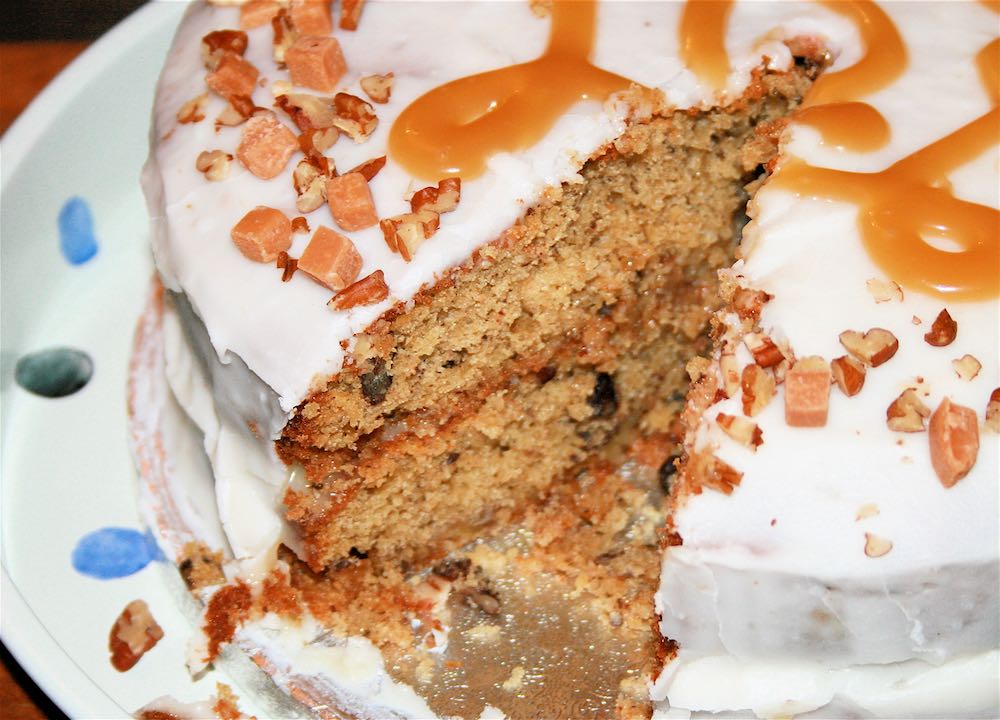
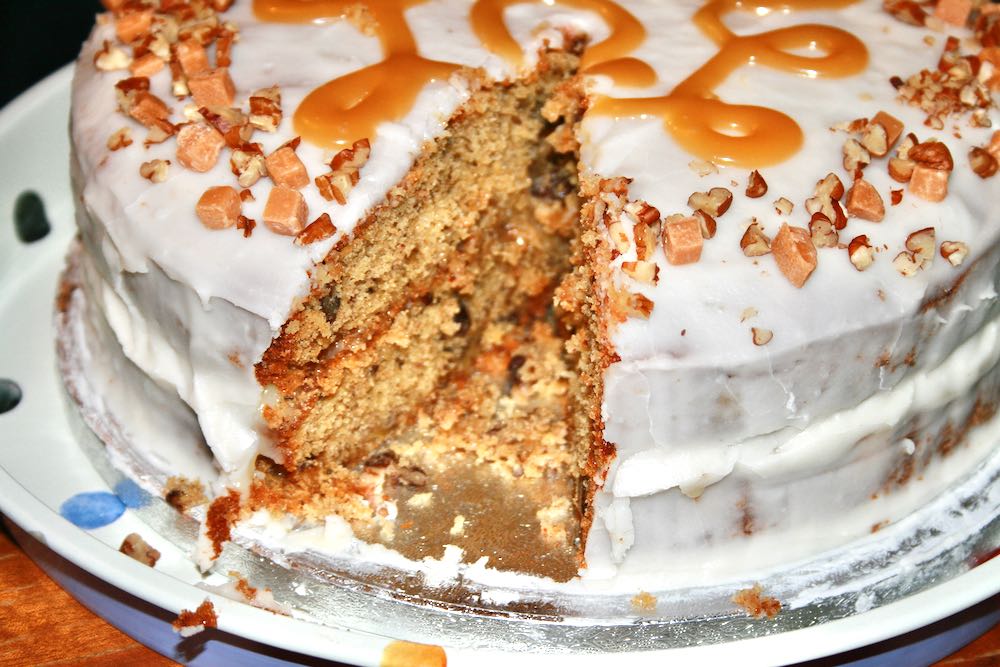
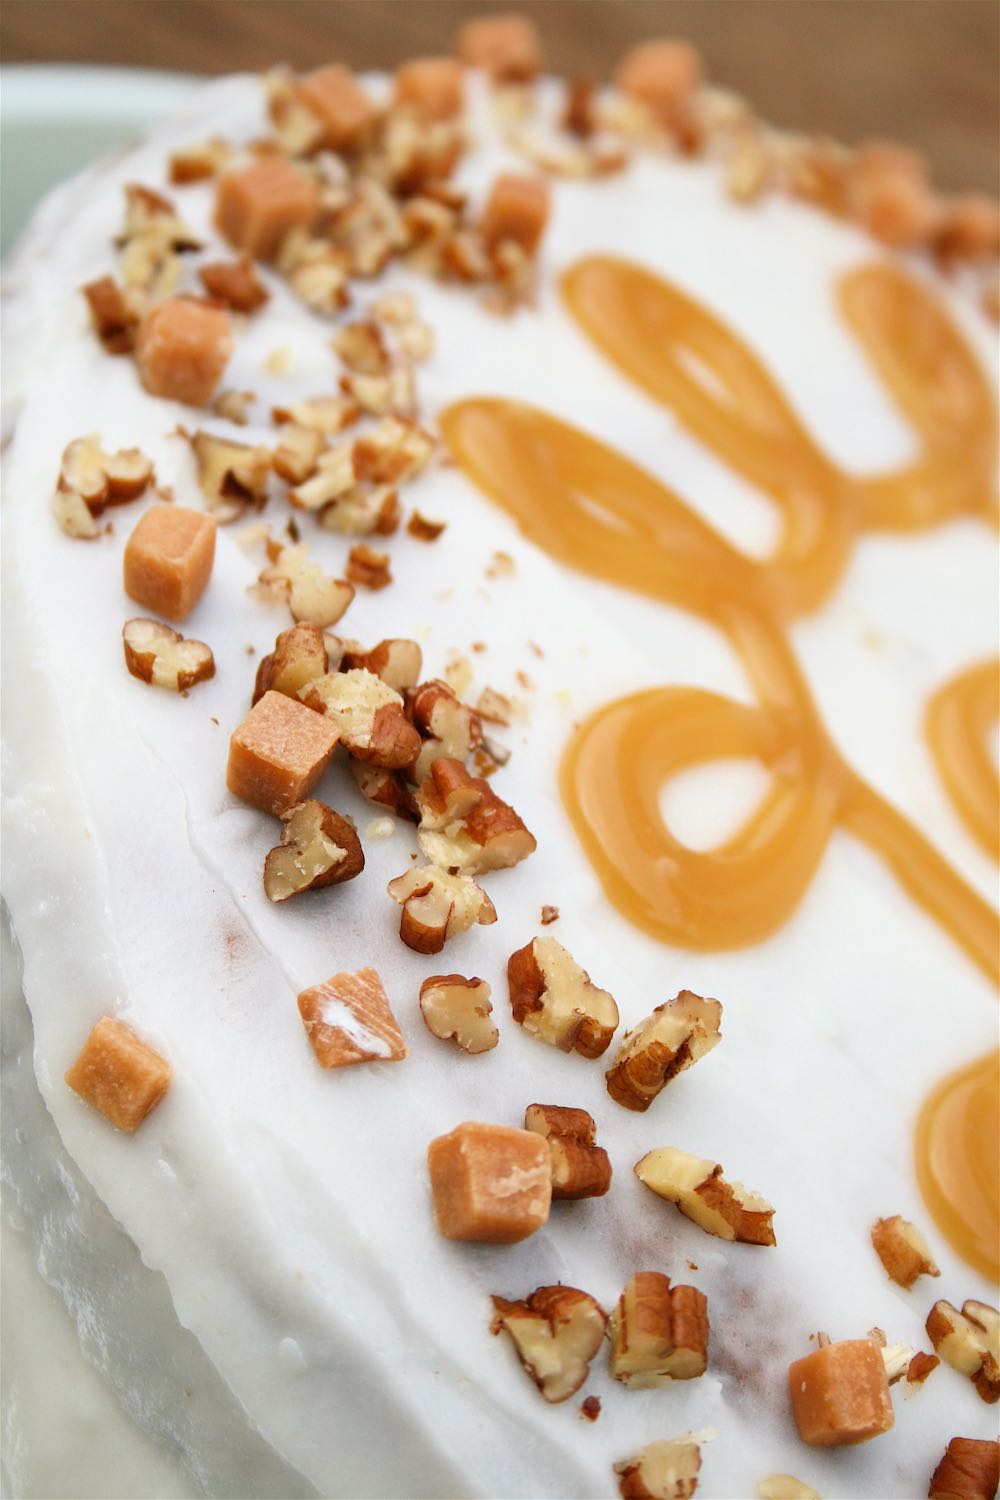
- Using a small palette knife, spread the banana cream cheese Icing over the whole cake in as thin a layer as you can but so the sponge does not show through. Sprinkle chopped pecans and fudge chunks around the edge of the cake to decorate. Put in the fridge for an hour to harden off the surface before drizzling over the toffee sauce.
- Fill a disposable piping bag with a couple of tablespoons of caramel sauce to drizzle in the pattern of your choosing. You can either put the cake in the fridge again to harden the toffee sauce or serve straight away. As you can see in the picture below, the sauce goes back to a runnier caramel at room temperature. If you don't want to fuss with piping you could just let it run off a teaspoon in zig zags.
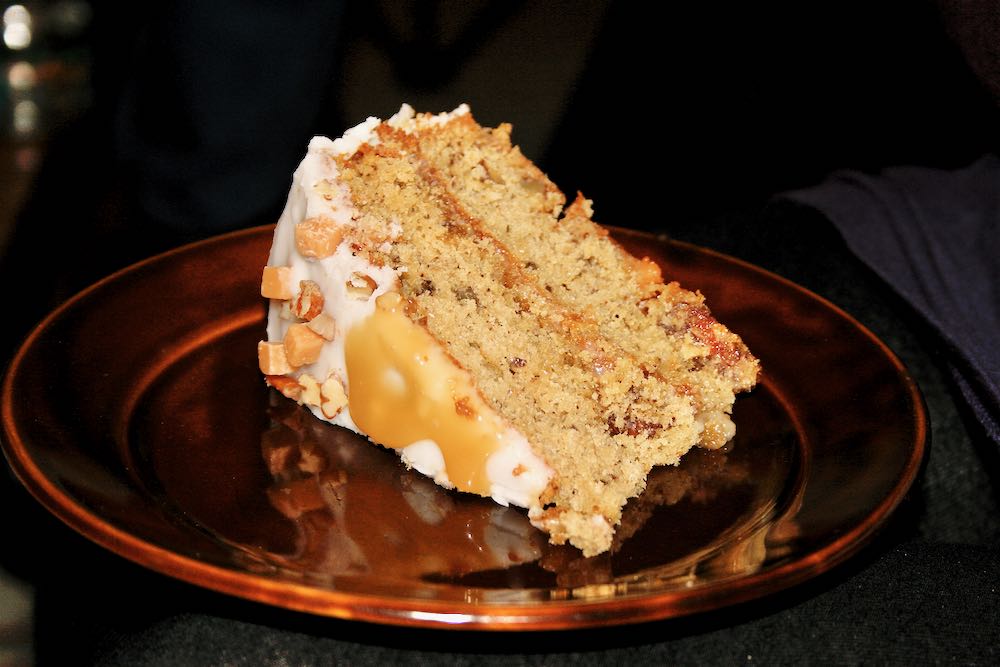
My husband says I have to tell you that he took this photo. He used a flash as it was very dark by the time we sliced the cake.

Yes such a shame when the light inside isn't very good but it doesn't detract from how good this cake looks! 😀
It looked good and by golly it tasted good
Auntie Angi xx