Search this site

Maison Cupcake

Home Cooking and Baking by Sarah Trivuncic

  • Home
  • About
  • Recipes
    • Baking and Desserts
    • Family Food Ideas
    • Party Food Ideas
  • Misc
    • Journal
    • Classes and Events
You are here: Home / Recipes / Baking and Desserts / Easter Bunny Pops – Homemade Chocolate Treats

Easter Bunny Pops – Homemade Chocolate Treats

April 4, 2012 by Sarah Trivuncic 15 Comments

This site content is free. When you purchase via referral links on our posts, including those to Amazon, we earn affiliate commission, at no extra cost to yourself. Thanks for reading and please share posts you find useful!

Easter Bunny Pops - a small boy holds a small pink chocolate bunny on a stick in front of his face.

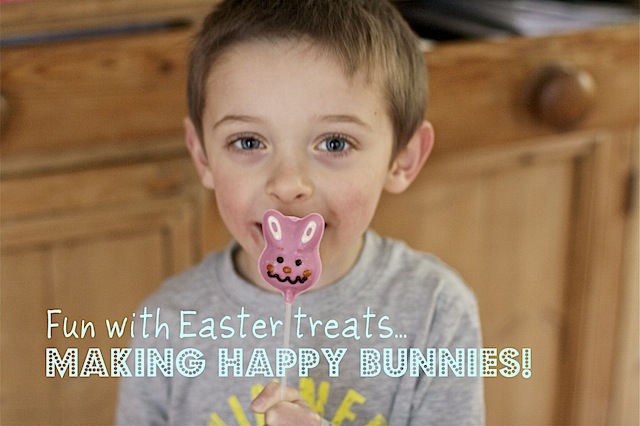
Easter Bunny Pops are quick and easy to make with candy melts (buy them at Hobbycraft) and an Easter Bunny mould. Post originally commissioned by Lakeland who sent various items from their Easter range at the time.

There’s more to Easter goodies than giant eggs and a colourful delivery of Lakeland’s wide range of Easter baking and treat making products silicon moulds and trays gave us opportunity to have a play making chocolate bunnies and chicks.

Lakeland Easter Chocolate Making Kits

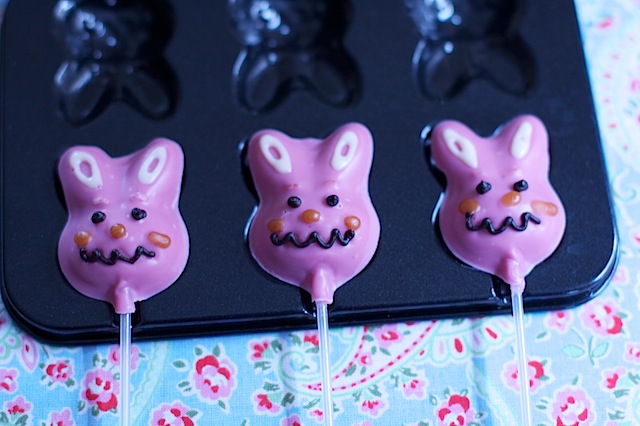
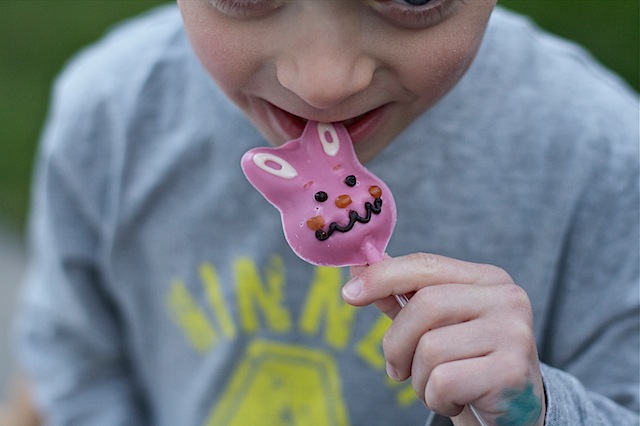
First up was the metal chocolate bunny lolly mould. I made use of pink strawberry chocolate buttons by Silver Spoon to make our rabbit lollies pink.

Lakeland Easter Chocolate Making Kits

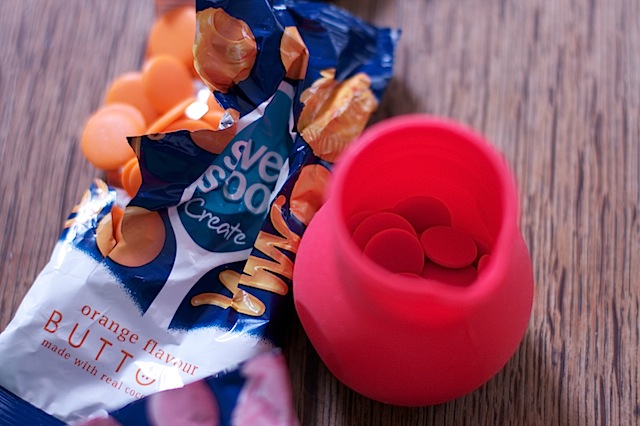
Jolly useful to melt coloured buttons and chocolate chunks was this dinky silicon chocolate melting pot. I was sceptical at first whether I’d see a point to this but quickly changed my mind.

It’s ideal for melting small quantities of chocolate in the microwave – my only gripe is that I could do with 3 or 4 of them to have several shades of molten chocolate on the go at once!

The pot is big enough to melt 100g of chocolate chunks in one go but take care to microwave chocolate in short bursts so you don’t burn it.

Lakeland Easter Chocolate Making Kits

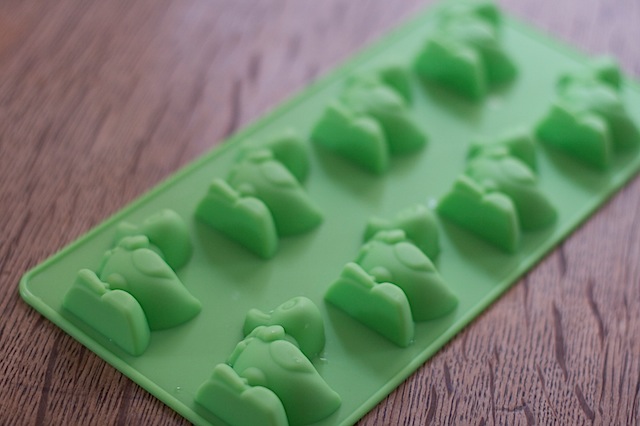
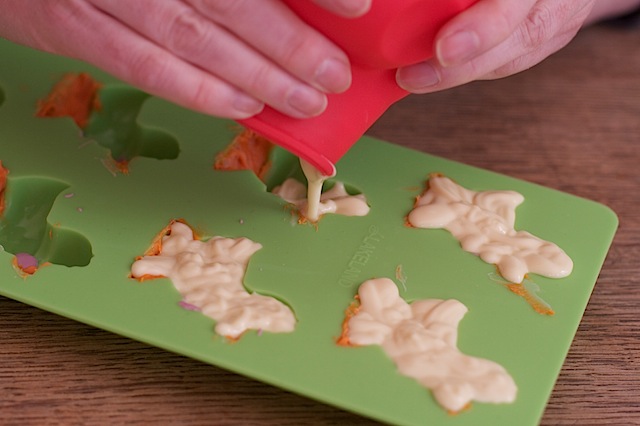
Lakeland have a couple of Easter themed silicon moulds – this green one was my favourite as you may recall I collect lime green objects for my kitchen!

Lakeland Easter Chocolate Making Kits

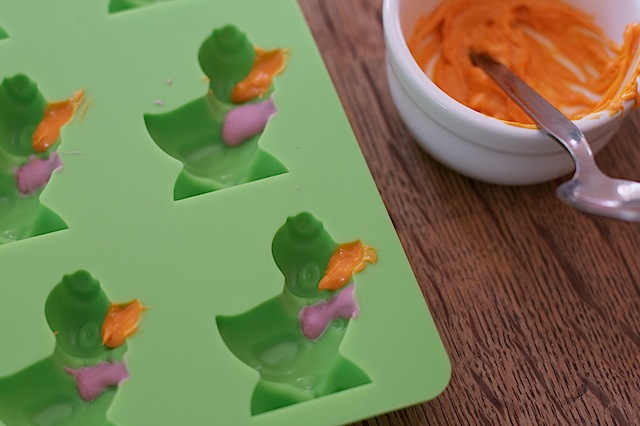
Melting a little each of pink and orange chocolate buttons gave us pink bows for the ducks and orange beaks and feet.

Easter-chocolate-making

To my surprise, Ted was quite accurate painting orange feet on the ducks although he got bored after doing 3 of them and ran off to play elsewhere despite his enthusiasm and insistence 30 seconds earlier that he help.

(N.B. Actually left in shot is a bowl of left over butternut squash soup incase you’re thinking the bigger bowl is melted buttons too!)

Lakeland Easter Chocolate Making Kits

I especially liked the silicon chocolate melting pot since you could squeeze the spout to pour accurately and it’s flexible enough to turn inside out and clean easily.

It also comes with a fitted lid.

Lakeland Easter Chocolate Making Kits

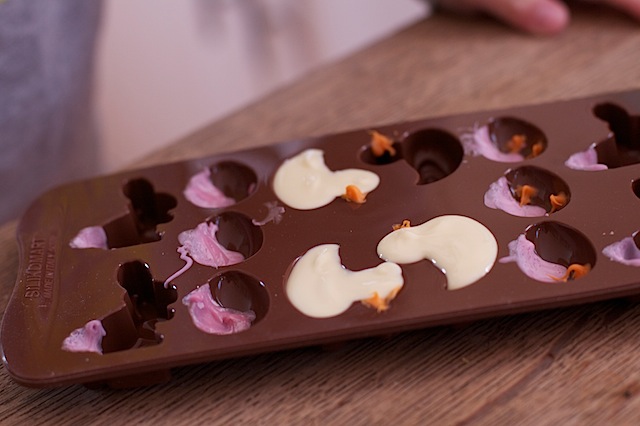
Another Easter chocolate mould by Silkomat gave a selection of smaller ducks, eggs and bunnies. Here I gave milk chocolate bunnies pink tails and coloured in different panels on the mini eggs.

After letting one colour of chocolate cool I added the white or milk chocolate on top. When that’s cooled too the mould can go into the fridge to set completely.

Lakeland Easter Chocolate Making Kits

Once set hard, the chocolates pop out of their moulds effortlessly, even the larger ducks. You can see above the ducks’ feet have some air bubbles, it was tricky to tell whether you’d gone in the corners properly but on reflection I think this was due to the orange buttons not melting as well as the the pink, milk and white chocolate.

As you can see, the milk chocolate comes out very glossy with no marbling. The white chocolate separated a bit on cooling but at least didn’t show up too badly.

Lakeland Easter Chocolate Making Kits

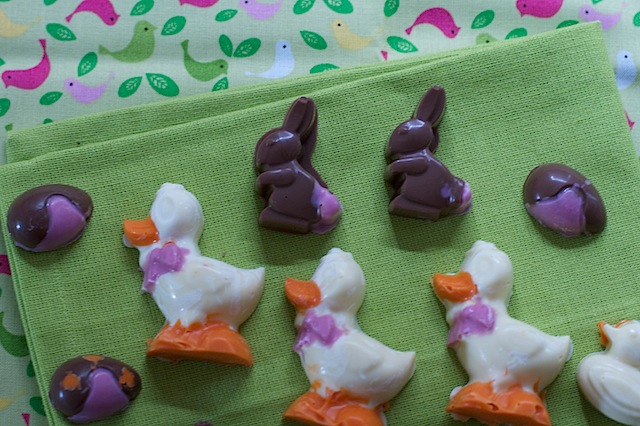
As we were visiting some of Ted’s friends the next day I assembled these Lakeland treat boxes which are ideal for a handful of small chocolates. These boxes are not very big, they’d be ideal for a selection of sweets rather than a complete gift or small cake. I managed to fit 2 big ducks and 3 smaller chocolates into each one.

Pink Chocolate Easter Bunny Pops using Lakeland Easter Mould

Making Easter Bunny Pops

The pink bunnies came out very well however the orange button chocolate didn’t melt properly and went marbly after I thinned it with a little trex.

Their faces were drawn with tubes of chocolate and caramel writing icing from Sainsbury’s own brand of cake decorating products.

The bunnies also pop out of their metal tin very easily however I was cautious not to snap the sticks out of the chocolate. Probably this bit is best done by a grown up!

Lakeland, at the time of updating this post (February), are not currently stocking this mould anymore but this one from Amazon is very similar >> Easter bunny lolly moulds* (affiliate link)


With thanks to Lakeland for sample Easter products.

Easter Bunny Pops - a small boy holds a small pink chocolate bunny on a stick in front of his face taking a bite.

More Easter Treat Ideas

As well as Easter Bunny Pops I have made Easter Cookies with Paté Sablée (it’s a type of pastry/cookie dough – very easy!)

For a showstopping Easter Cake try my Easter Chocolate Praline Cake.

My other favourite Easter cake is covered with Coco Pops and I call it my Rabbit Poop Cake.

A bit of a theme here, see also Easter Bunny Bum Cake with cute bunny bottoms and tails on the top!

This site content is free. When you purchase via referral links on our posts, including those to Amazon, we earn affiliate commission, at no extra cost to yourself. Thanks for reading and please share posts you find useful!
Filed Under: Baking and Desserts Tagged With: cake pop recipes, chocolate, Easter

About Sarah Trivuncic

Sarah Trivuncic has published recipes, restaurant and travel reviews on Maison Cupcake since 2009. She lives in Walthamstow, East London with her husband and teenager.
Read More/Contact

« Spring has sprung new changes on “Forever Nigella”!
Frankie and Benny’s Chingford »

Comments

  1. Kelly says

    April 4, 2012 at 5:11 pm

    I love my bunny mold! I filled mine with cheesecake.

    Reply
    • Sarah, Maison Cupcake says

      April 7, 2012 at 1:47 pm

      That sounds good – I hope the bunnies stayed intact when you popped them out?

      Reply
  2. Fleur McCrone says

    April 4, 2012 at 7:02 pm

    Great review Sarah. I was in Lakeland earlier today and looked at some chocolate moulds. Might have brought some if I had read this first, as I just could not imagine how they might look. But they look fab! I’ve also got to say that your little boy Ted is soooo cute. Such gorgeous little eyes peering over the chocolate bunny.

    Reply
    • Sarah, Maison Cupcake says

      April 7, 2012 at 1:48 pm

      They’re definitely an easy fun activity, barely anything more to do than melt the chocolate. We’ll be making them every year now!

      Reply
  3. Urvashi says

    April 4, 2012 at 7:27 pm

    Really gorgeous imagery Sarah xx

    Reply
  4. Jacqueline says

    April 4, 2012 at 11:34 pm

    Brilliant. What fun to be had. I am going to pay Lakeland a visit right now. Shhhhhh! Don’t tell hubby. When I go to Lakeland, after a wee while he comes in and follows me around the shop questioning everything I buy and pointing out that this and that were not what I cam in for. Spoil sport!

    Reply
    • Sarah, Maison Cupcake says

      April 7, 2012 at 1:46 pm

      Lol, sounds like a few people I know although mercifully not my husband!

      Reply
  5. Ren Behan says

    April 5, 2012 at 6:18 pm

    Lovely! They all came out really well and I love the treat boxes 🙂 We have a big Lakeland store here so I can see a little trip coming up!

    Reply
  6. Kate - turquoise lemons says

    April 7, 2012 at 8:11 am

    This looks so fun! I spent yesterday also making some home made chocolates but that silicone pot looks genius. The rabbits and ducks look brilliant!

    Reply
    • Sarah, Maison Cupcake says

      April 7, 2012 at 1:45 pm

      Thanks, I was really pleased how they came out, especially the pink and orange bits.

      Reply
  7. Made With Pink says

    April 7, 2012 at 8:40 pm

    Sarah, thanks so much for your comment on my blog about my chocolates. I hadn’t seen this post until now! Yours look fantastic as well, and I’m sure Ted had a great time making them (despite running off). I can’t wait until Jayden can help me in the Kitchen like Ted helps you. Hope your large egg turned out well, and that you all have a fabulous Easter! – Andrea xx

    Reply
  8. Emma says

    April 13, 2012 at 9:22 am

    I was really lucky and picked up one of the bunny moulds half price a couple of days before Easter. I’ve used it a couple of times, just using melted dark chocolate with some peppermint extract added. Really easy to use and very effective. I found tapping the mould fairly firmly on the bench a few times got rid of any air bubbles.

    Reply
    • Sarah, Maison Cupcake says

      April 17, 2012 at 9:40 am

      Yes tapping it would be helpful – though probably only with tin moulds rather than silicon?

      Reply
  9. Laura says

    April 26, 2012 at 2:30 pm

    So simple yet so effective! I’ve used the molds before but never used different coloured/flavoured chocolate – Infact I dont recall ever seeing those flavoured buttons anyway. Will definately be getting myself some for Halloween to make some spooky chocolates!

    Reply
  10. Spencer @ Moo-Lolly-Bar says

    April 3, 2014 at 1:47 am

    How cool! My kids would absolutely love them.

    Reply

Leave a Reply Cancel reply

Your email address will not be published. Required fields are marked *

Recipe Rating


© 2009-2025 Sarah Trivuncic

All content copyright of site owner
Sarah Trivuncic
except where otherwise stated. All rights reserved. Neither images or text may be reproduced without permission. Privacy / Disclosure

My Book

Cover of "Bake Me I'm Yours... Sweet Bitesize Bakes" by Sarah Trivuncic; image shows a selection of small cakes and patisserie. The book has a green polka dot spine edged with pink ribbon and a bow.

Copyright © 2025 · Foodie Pro Theme by Shay Bocks · Built on the Genesis Framework · Powered by WordPress

This website uses cookies to improve your experience. We'll assume you're ok with this, but you can opt-out if you wish.Accept Read More
Privacy & Cookies Policy

Privacy Overview

This website uses cookies to improve your experience while you navigate through the website. Out of these, the cookies that are categorized as necessary are stored on your browser as they are essential for the working of basic functionalities of the website. We also use third-party cookies that help us analyze and understand how you use this website. These cookies will be stored in your browser only with your consent. You also have the option to opt-out of these cookies. But opting out of some of these cookies may affect your browsing experience.
Necessary
Always Enabled
Necessary cookies are absolutely essential for the website to function properly. This category only includes cookies that ensures basic functionalities and security features of the website. These cookies do not store any personal information.
Non-necessary
Any cookies that may not be particularly necessary for the website to function and is used specifically to collect user personal data via analytics, ads, other embedded contents are termed as non-necessary cookies. It is mandatory to procure user consent prior to running these cookies on your website.
SAVE & ACCEPT